Blue Oyster Black Bucket Kit - Easy Guide
This guide shows you, step by step, what to do, no guesswork!
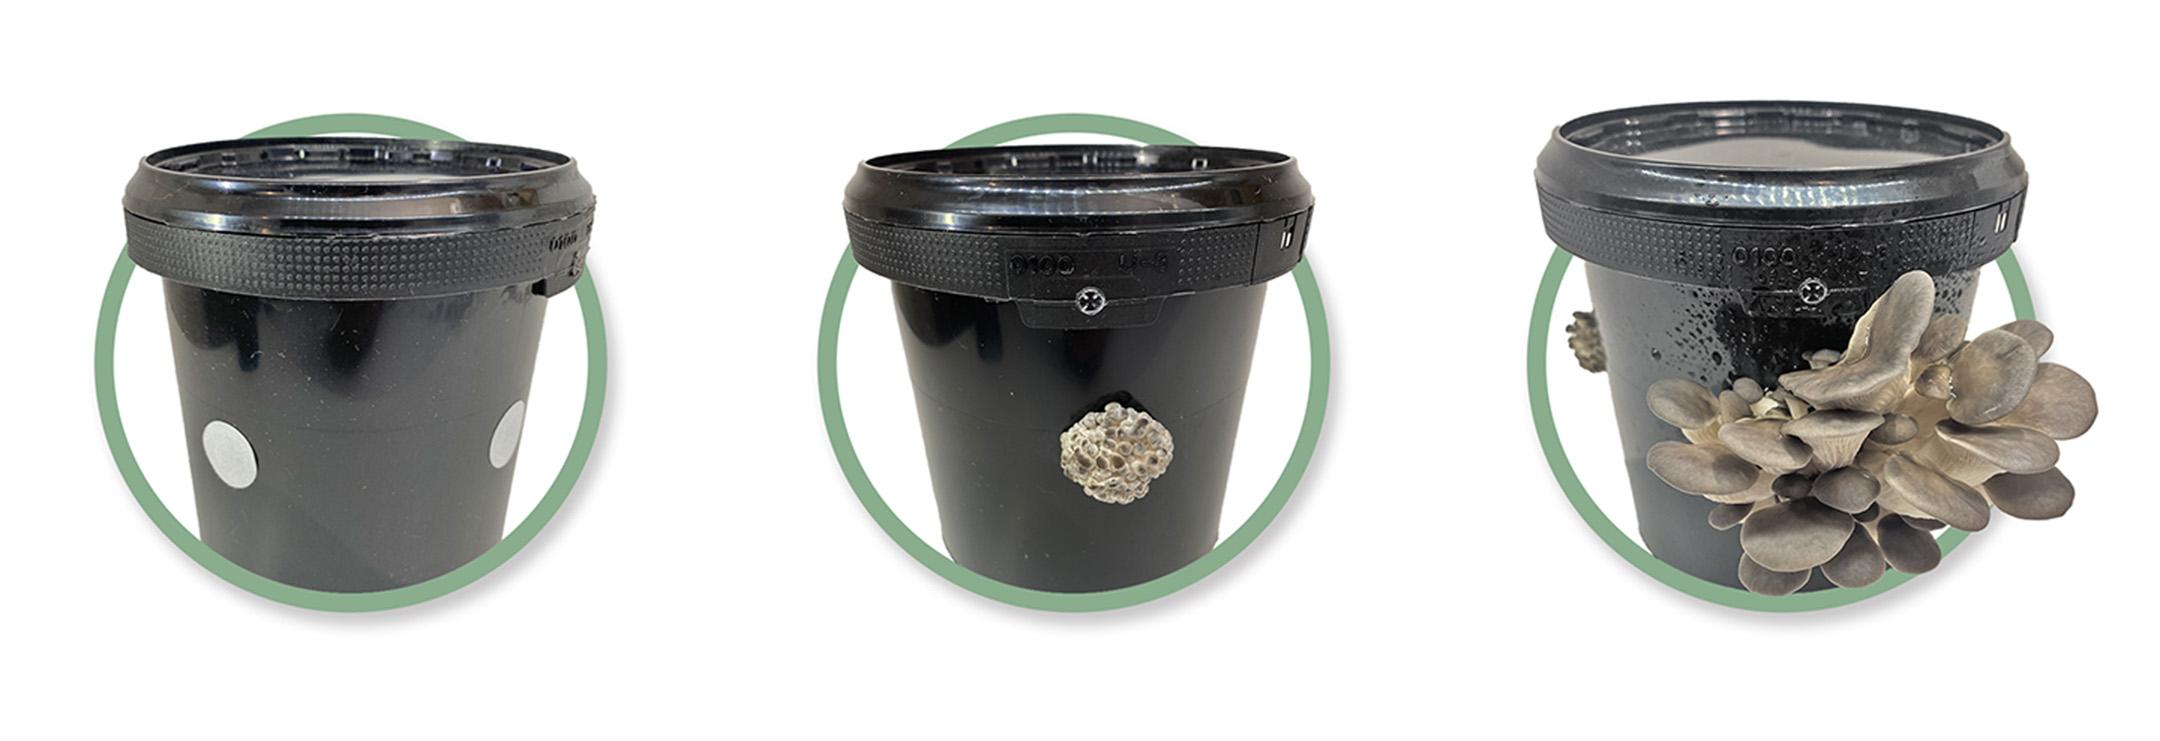
1.What’s in your kit?
- 1-litre black bucket with small round holes (covered with filters)
- Bucket is already full of growing material with mushroom mycelium inside
2. Store Somewhere Cool
- Store your mushroom grow bucket in a cool and shady spot. 15°C (5.9°F) — ideally around 16–21°C (60–70°F). Somewhere with indirect light (not direct sunlight).
3. When You See Pins
- From the date of your order, you can expect pinning (the appearance of tiny mushrooms) to begin approximately 15 to 30 days later depending on room temperature.
- Keep checking the filter holes every day.
- When you see tiny baby mushrooms (pins), it’s time to start misting the filter patches . Spray clean water on and around the holes twice a day to keep them moist.
- Place a tray or plate under the bucket to catch water drips.
4. Mushroom Growth
- Once pins appear, the mushrooms grow fast, sometimes doubling in size each day!
- In about 7–14 days from pinning, they’ll be ready to pick.
- When to harvest: caps still curled under at the edges. Don’t wait for caps to flatten, they’ll drop spores, covering the area with fine spore dust.
5. Harvest
- Grab the cluster of mushrooms at the base and twist it off gently, or cut it at the base with a clean knife.
- Try not to damage the white stuff (mycelium) left in the bucket — it can grow more!
6. More Mushrooms?
- After the first harvest, place surgical tape (same as the tape found in first aid kits), back over the exposed holes and wait for the kit to produce pins.
- With optimum conditions, you can usually get 2–3 harvests (flushes) before it stops producing.
Tips
- IMPORTANT : Always wash your hands before touching the bucket or mushrooms.
- Don’t put it in direct sun or let it dry out.
- Don’t leave mushrooms too long before picking — they’ll drop
- spores and won’t taste as good.